What Is a Printing Device and How Does It Work?
A Printing Device converts digital information into a physical image, text, or pattern. It may use ink, toner, heat, or specialized materials. Common examples include inkjet printers, laser printers, thermal printers, and three-dimensional printers. Although their designs differ, they share a practical purpose: translating computer instructions into accurate physical results.
The process begins when software sends a document to the printer driver. The driver converts that document into commands the machine can understand. Inside an inkjet printer, tiny nozzles place droplets across the paper. A laser printer uses light, static electricity, toner, and heat to form each page. The paper moves through rollers, sometimes making a faint clicking sound. Small errors matter. A blocked nozzle can create pale lines, while damp paper may curl near the output tray.
Understanding a Printing Device requires more than memorizing its parts. Real performance depends on resolution, print speed, media type, maintenance, and operating conditions. Manufacturers publish specifications, but practical results can vary between offices, classrooms, and home workspaces. A careful user checks compatibility, cleans suitable components, and follows safety instructions from reliable technical documentation. That description is useful, but incomplete. Modern devices also include wireless connections, scanning features, energy-saving modes, and security controls. These additions improve convenience, yet they can introduce setup problems. This guide explains how printing systems work, what happens inside the machine, and which everyday factors influence print quality.
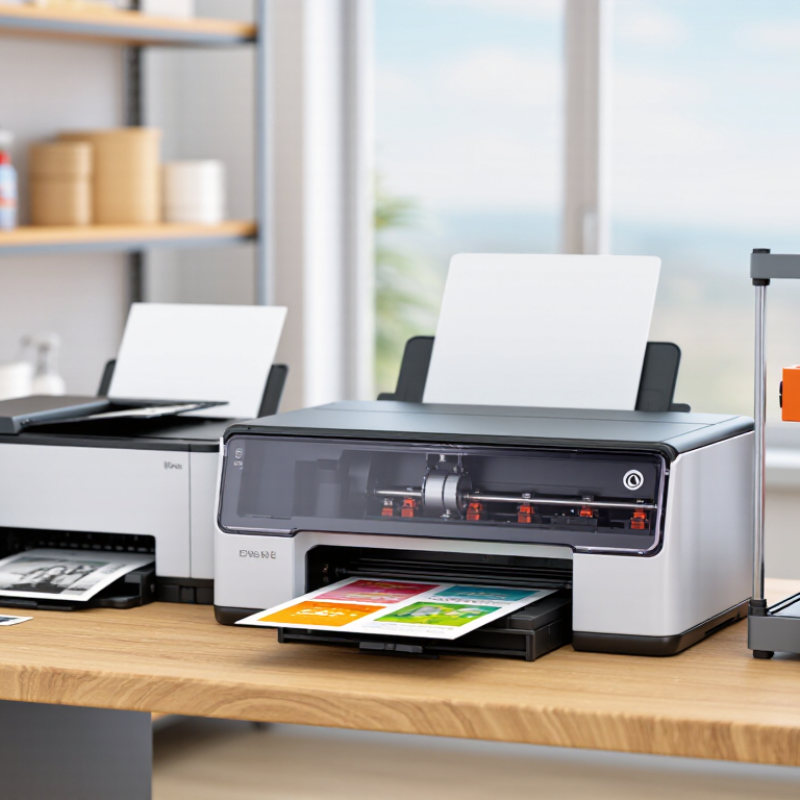
What Is a Printing Device? Core Functions and IEEE 1284 Interfaces
What Is a Printing Device and How Does It Work?
A printing device converts digital information into a physical image, text, or pattern. Its core functions include receiving data, processing commands, placing marks, and controlling paper movement. Inside, a controller interprets the print language and organizes each page. A marking system then applies ink, toner, heat, or another approved medium. Sensors monitor paper position and detect common faults, such as jams or an empty tray. The result should be readable and consistent, although real-world output can vary with paper quality, alignment, and maintenance.
The IEEE 1284 interface was created for reliable parallel communication between computers and printing devices. It supports several operating modes, including Compatibility, Nibble, Byte, ECP, and EPP. These modes manage data direction, timing, and handshaking between connected equipment. A basic mode sends data outward, while bidirectional modes allow status information to return. This feedback helps the device report readiness, errors, or completed transfers. In practice, cable quality and device compatibility matter. The standard is useful, but it is not a universal solution for every modern workflow.
Tips: Check the interface mode before installation. Use a suitable cable and avoid unnecessary length. Confirm that both devices support the same communication features. Print a test page after connection. Small details matter. I have found that unclear status messages can cause more delay than slow data transfer. Reviewing settings manually may feel old-fashioned, yet it often reveals the real problem.
How Data Moves: From Print Driver to Raster Image Processor
A printing device begins with data, not paper. An application creates a document, then sends instructions through the operating system’s print driver. The driver translates fonts, colors, page size, and finishing requests into a language the device can interpret. The job usually waits in a spooler, which manages timing and temporary storage. It is invisible.
The Raster Image Processor, or RIP, is where the workflow becomes visual. It interprets page description commands and converts them into a raster image, often represented as tiny dots arranged in rows. Each dot receives position, density, and color information. The RIP may also apply trapping, halftoning, screening, and color conversion. A complex PDF can therefore require substantial processing before the first sheet moves. Not magic. Just computation.
The raster data then travels to the imaging system, where lasers, LEDs, inkjet nozzles, or other mechanisms reproduce the calculated pattern. ISO/IEC 24711 defines methods for measuring ink cartridge yield, while ISO/IEC 24734 standardizes print-speed testing. These standards matter because advertised speed can differ from real workflow performance. Smithers’ The Future of Digital Printing to 2028 projects the digital printing market to exceed 230 billion dollars by 2028, increasing pressure on efficient RIP architecture. Yet faster hardware does not solve every bottleneck. Large images, transparency effects, and poorly prepared fonts can still slow production. A driver may also interpret the same file differently after an update. That is an uncomfortable detail, but it deserves testing.
How Inkjet Printing Works at 300–1,200 dpi
A printing device converts digital information into marks on paper or another surface. In an inkjet printer, a controller reads the image as a grid of tiny color decisions. The printhead then moves across the page, releasing microscopic ink droplets through many narrow nozzles. Each droplet is placed with careful timing.
At 300 dpi, the device addresses about 300 dots across one inch. At 1,200 dpi, it can control four times as many positions horizontally and vertically. Higher dpi can sharpen small text, fine lines, and gentle color transitions. However, dpi does not tell the whole story. Droplet size, paper texture, ink absorption, and alignment also affect visible detail.
During practical testing, plain paper often makes high-resolution output look softer than expected. Coated paper usually keeps droplets closer to their intended locations. The printer may mix cyan, magenta, yellow, and black dots to create a wider visual range. Some systems vary droplet volume, while others rely more heavily on dot spacing. The process is fast, but not flawless. A slightly clogged nozzle can leave a pale streak across a dark image. Misalignment can create rough edges around small letters. Cleaning cycles restore performance, although they consume ink and time. The 300–1,200 dpi range describes positioning capability, not guaranteed image quality.
How Laser Printing Works with 600–2,400 dpi Resolution
A printing device turns digital instructions into marks on paper. In laser printing, the process begins inside the printer, not at the paper tray. A drum receives a controlled electrical charge. A laser then draws each page as tiny points across the drum’s surface.
Where the laser touches, the charge changes. Toner particles, made from fine pigment and plastic, stick to those selected areas. The drum presses the image onto paper, and a transfer stage moves the toner across. Heat and pressure from the fuser bond the particles to the fibers. The page feels warm for a moment.
Resolution is measured in dots per inch, or dpi. A 600 dpi engine can place 600 dots across one inch horizontally and vertically. At 1,200 or 2,400 dpi, curved letters and thin lines usually appear smoother. Higher dpi does not always mean better pages. Paper texture, toner control, calibration, and image processing matter greatly. I have seen dense graphics look softer on cheap paper, even at high resolution. That detail is easy to miss. Tiny dots are not the whole story. Fine text may sharpen at 2,400 dpi, but printing can become slower and consume more toner. Test pages remain useful because real results often differ from technical specifications.
What Is a Printing Device and How Does It Work? - How Laser Printing Works with 600–2,400 dpi Resolution
| Technical Dimension | Typical Data | How It Relates to Laser Printing |
| Printing Technology | Electrophotography | The image is created with electrostatic charges and transferred to paper instead of being applied by liquid ink. |
| Common Resolution Range | 600 × 600 to 2,400 × 2,400 dpi | Higher dpi allows the device to place smaller image elements and reproduce finer edges, although perceived quality also depends on toner, paper, and image-processing controls. |
| Approximate Dot Pitch | 42.3 μm at 600 dpi; 21.2 μm at 1,200 dpi; 10.6 μm at 2,400 dpi | Dot pitch is the theoretical spacing between addressable points, calculated from 25.4 mm divided by the dpi value. |
| Image-Carrying Surface | Photosensitive drum or flexible belt | The surface temporarily holds the electrostatic pattern before toner is applied. |
| Step 1: Charging | A substantially uniform electrical charge is applied | This prepares the photosensitive surface to receive the digital image pattern. |
| Step 2: Exposure | A laser beam selectively changes the surface charge | The exposed areas form a latent electrostatic image corresponding to text, graphics, or photographs. |
| Step 3: Developing | Dry toner particles are attracted to selected areas | Electrostatic forces cause toner to follow the invisible charge pattern on the drum or belt. |
| Step 4: Transfer | Toner is moved from the drum or belt onto paper | A controlled electrical field helps pull the toner image onto the sheet as it passes through the transfer area. |
| Step 5: Fusing | Heat and pressure bond toner to the paper | The fuser softens the toner and presses it into the paper fibers, producing a durable printed surface. |
| Toner Type | Dry powder containing pigment, resin, and additives | The resin enables fusing, while the pigment supplies black or color output. |
| Color Printing Structure | Four process colors: cyan, magenta, yellow, and black | Color devices combine separate toner layers to create a broad range of visible colors. |
| Typical Office Print Speed | Approximately 20–60 pages per minute | Actual speed varies according to device design, page coverage, paper size, resolution mode, and whether printing is monochrome or color. |
| Output Characteristics | Sharp text, consistent solid areas, and fast-drying pages | Toner is fused to the sheet, so pages normally do not require drying time and are resistant to wet smearing. |
| Resolution Limitation | Dpi is not the same as visible detail | Optical exposure accuracy, halftoning, toner distribution, paper texture, and mechanical alignment also influence the final result. |
How ISO/IEC 24734 Measures Print Speed in Images per Minute
A printing device converts digital files into physical pages through controlled imaging, ink or toner placement, and paper handling. Its speed, however, cannot be judged by watching one page leave the tray. ISO/IEC 24734 provides a more consistent method for measuring office print productivity.
The standard reports speed in images per minute, or ipm. An image usually means one printed side of a sheet, not a photograph. A duplex sheet therefore contains two images. Testing uses a defined set of office documents, including text-heavy pages and mixed content. The device runs under recommended settings, while timing considers the first completed set and sustained output. This helps separate a quick first page from stable production speed.
The result is useful.
In practical comparisons, I would record paper size, print mode, resolution, and whether automatic duplexing is enabled. Those details can change the outcome noticeably. A claimed speed may also reflect draft settings, while everyday documents use heavier coverage. That is where the standard has limits. ISO/IEC 24734 improves fairness, but it cannot reproduce every workplace. A busy office may print spreadsheets, envelopes, and occasional graphics, creating pauses that a controlled test does not show. Treat ipm as a reliable reference point, not a promise for every task. Real purchasing decisions still need sample documents, measured wait times, and attention to operating conditions.
What Is a Printing Device and How Does It Work?
A printing device converts digital information into a physical image on paper or another media. Print productivity can be expressed in images per minute (IPM). In this educational model, IPM is calculated as 60 ÷ average seconds per printed image.
Print Speed Expressed in Images per Minute
The chart shows mathematically derived throughput scenarios based on the average time required to produce one printed image. ISO/IEC 24734 provides standardized procedures for measuring the productivity of digital printing devices using office-category test documents and reporting results in images per minute. Actual results may vary with document content, print settings, media, warm-up time, and operating conditions.